Biiig cookie🍪

I can’t remember the last time I posted a new recipe. I’ve been so busy at work, and in early July also moved house. It’s been… a lot.

But I finally got some time to myself and since I’ve been baking this skillet cookie for months now, since it’s such an easy recipe, I thought it’s time to share the recipe! Great for when you have guests as you can just put the tray on the table and let them help themselves.

Ingredients

100g almond meal

80g rice or buckwheat flour

50g rapadura or other sugar

100g apple sauce, jam, or pumpkin purée (basically what you’ve got in the cupboard)

70g liquid coconut oil

1 tbsp apple cider vinegar

1 tsp bicarbonate of soda

Then for filling I usually combine chocolate chunks and berries, but knock yourself out!

This doesn’t last long…

Instructions

Pre-heat the oven to 170C.

Mix all of the ingredients and pour into a pre-oiled skillet or tray.

Add the filling at the end: press chocolate chunks and berries randomly on the cookie.

Bake for 20 mins. Leave to cool for half an hour. Enjoy with ice cream!

Healthy cranberry mince pies

I’ve had one busy term at work, and it made me very sad not to have time to bake. So I’ve been catching up in the past few weeks since my workload has eased (a little…). Strangely (or perhaps not strangely, considering these discomforting times), it took a while to get my creative juices flowing again: for the first few weeks I just used my existing recipes or other people’s. But while talking to friends in the UK and Ireland, I got so nostalgic (not to mention upset about not being able to travel there) about a British-Irish christmas, I just wanted to do something so I could at least feel I was there in spirit. So this mince pie recipe was stewing in my mind for a while (and no, this isn’t a meat pie for those of you unfamiliar with the Irish and British tradition of mince pies: though in Tudor times they had mince meat in them, it is now a supersweet dessert with dried and fresh fruit and spices).

The problem is that the bought ones have so many additives and sugar, not to mention (non-vegetarian) suet, that I wanted to create a recipe that’s completely gluten-free, lactose-free, low on (non-refined) sugar, alcohol-free, and vegetarian – yet still delicious for an allergy-prone person like me. (I took some recipes on the BBC Good Food website as a starting point – thank you BBC!) Just to warn you, this recipe does take some preparation, so don’t make these when you’re in a hurry. What I’ve enjoyed most about making these is the smell! While the mince was soaking, I went over every few hours to just go and just stand over the mixture and let the smells carry me to Wales and Kildare. It’s the smell of Christmas for me – delicious!

Update: I had my first one this morning and I didn’t have any reaction, so that’s great. I hope you enjoy these too! Oh, and Merry Christmas!

Ingredients

For the mince:

250g sultanas (I love the yellow ones, but use whichever you prefer, or raisins etc.)

70g dried unsulphured apricots

40g dried cranberries

zest and juice of 1 lemon and 1 orange juice

40g coarsely grated apple

80g fresh cranberries

100ml of ginger ale

100g lactose-free butter

100g raw cane sugar

1 tsp cinnamon

1 tsp mixed spice

For the pies:

120g lactose-free cold butter, diced

120g rice or buckwheat flour

60g almond flour

20g potato starch

1/2 tsp psyllium

zest of one lemon

60 mls of water

some extra flour for when you’re rolling out the dough

Instructions

  • A day before you want to make the mince pies, put all the ingredients for the mince (except butter, sugar, and the spices) in one bowl and mix well. Leave to soak up the beautiful ginger ale and juices of the lemon and orange.
  • Around 24 hours later, put the mincemeat mix with the butter, sugar, and spice into a pot, bring to a boil and then let simmer for around 5 minutes. You’ll see that the mixture starts to thicken. Put the mix into a sterilized pot if you want to keep it for longer. Let cool down entirely.
  • Pre-heat the oven to 180C.
  • Then, you can start making the pies: rub all the pie ingredients except the water together, and then add the water to knead into a flexible dough.
  • Put the dough into the fridge for at least 30 mins. Then roll it out to 1/3 inch or less than 1 cm thickness and cut circles out of it (it’s easier when you sprinkle your rolling surface with some extra rice or buckwheat flour first). Put the pie crusts into little tartlette moulds (such as these – no I’m not sponsored!), fill properly with mincemeat, and add little christmas shapes of the dough on top.
  • Bake for 20 minutes (keep an eye out because they can suddenly burn) and leave to cool. Top out of the tartlette moulds and sprinkle with e.g. stevia. Serve with, oh I dunno, some lovely vegan ice cream, or just enjoy on its own for breakfast as my kid did today!

Carrot & choc chip cookies

I haven’t baked cookies in a while, but after my gorgeous yoga class this morning, I felt inspired! I always try to bake with food that needs to be used up, and today that was carrot. My first intention was to just bake carrot and oat cookies, but couldn’t resist throwing in some chocolate chips…

Ingredients

100g grated carrot

90g oats

90g buckwheat flour (you can use rice flour)

90g sugar (or xylitol)

50g cold butter, diced (vegan butter will work fine)

30g maple syrup

30g tapioca flour

1 tsp baking powder

1/4 tsp psyllium husk (you can replace this with xanthan but psyllium is actually good for your bowels so I prefer using it when I can)

Pinch of salt

1-2 tbs milk of any kind

50g choc chips (optional – I used 80% cocoa)

Instructions

Pre-heat the oven to 180C.

Put all the ingredients apart from milk and chocolate chips together in a bowl.

Rub the butter through the rest of the ingredients with your fingers until you have a sticky dough.

If everything doesn’t stick enough, add 1 to 2 tbsp milk.

Then add the choc chips so they’re well divided among the dough.

Turn the dough into a sticky mass and take little chunks out one by one to make the cookies.

Roll the chunks of dough into little balls and flatten them on a baking plate with sheet.

Once all the cookies are shaped, bake for 15 minutes.

Enjoy!

Lemon curd no bake cheesecake

Today, I had some lemons, cream, and cookies that urgently needed to using. Cue this ridiculously easy lemon curd cheesecake, with a minimum number of ingredients yet maximum flavour. That it’s almost gone entirely half an hour after I took it out of the freezer is proof of its deliciousness. My family just won’t stop eating…


Ingredients

For the curd:

2 eggs

80g sugar or substitute

Juice and rind of 2 lemons

For the cheesecake:

400g cookies (I took a mix of lemon and choc chip cookies – but think reasonably about which flavours will match)

75g lactose free butter

400g lactose free cream cheese

200g lactose free heavy cream

100g sugar or substitute

125g lemon curd

IMG_20190217_193037.jpg

Instructions

For the lemon curd, put all the ingredients into a pot on top of another pot with boiling water. Keep mixing vigorously for about 5 minutes until the mix starts to thicken. Put into a jar to cool down (and keep away from your mother so she doesn’t eat it all😄)…

For the cheesecake, start by making the base: break up all the cookies and crumb with your hands. Add the melted butter and mix until it comes together in a sticky dough. Press to the bottom and sides of a pre-oiled round baking tin and put in the fridge to set.

Next, make the cheesecake mix. Beat the cream and sugar until the cream comes together in stiff peaks. Add the cream cheese and lemon curd and mix again until well combined.

Put the mix in the tin and put in the freezer for 1,5 hours. It’ll be ready to serve. You can leave it for another hour which will allow it to set further, but my family simply wouldn’t wait…

Enjoy!

IMG_20190217_193029.jpg

Crunchy chewy hazelnut biscuits

Crunchy on the outside, chewy on the inside – these biscuits are a household favourite… To the extent I’m thinking of starting to bake triple batches so they actually last more than a day! These are super light and delicate little showstoppers, to be enjoyed with a cuppa and a sudoku 😉

Ingredients

1 egg white

80g sugar or substitute

90g hazelnut flour (or replace with other nut flours except coconut)

20g tapioca starch

1/2 tsp baking powder

Rind from 1 lemon

1/2 tsp almond extract

15g melted butter (vegan works too)

Instructions

Preheat the oven to 140C.

Combine hazelnut flour, tapioca, baking powder, lemon rind, butter, and almond extract in a bowl.

In another bowl, beat the egg white and slowly add the sugar. Then beat for 5 mins until stiff peaks form.

Add the other ingredients and mix slowly until well incorporated.

Drop teaspoons of the mix onto baking parchment on a baking sheet – leave sufficient space between cookies as these spread.

The mix will be sticky but don’t worry about that. The cookies will come out looking smooth.

Bake for 22-25 mins until golden.

Leave on the baking sheet until cool, then scrape off carefully with a flat spatula.

You can always drizzle melted chocolate on and decorate further, but I like to leave them basic for the moment (fewer calories😁). IMG_20181103_163828.jpg

Courgette choc chip cookies

Life has gone into a higher gear recently so I haven’t been able to bake as much. But this weekend I wanted to bake some cookies for my kid to take with him to school next week. I’ve wanted to experiment with courgettes in cookies for ages, and these are certainly a healthy and filling snack for school or work!

Ingredients

1 egg

115g softened butter (dairy-free works too)

40g sugar or substitute

90g runny honey

1 tsp vanilla extract

120g buckwheat flour (replace with rice or oats)

80g teff flour (replace with almond or other nut flour)

70g tapioca starch (replace with potato or corn starch)

1/2 tsp bicarbonate of soda

Pinch of salt

1/4 tsp nutmeg

125g grated courgette

125g chopped dark chocolate chunks

Instructions

Preheat the oven to 175C.

Mix all the wet ingredients separately, then mix the dry and add to the wet.

Add the courgette and choc chunks at the end.

Add a little bit more buckwheat flour if it’s too sticky.

Take tablespoons of the mix and drop them on a baking sheet. Smooth the tops of the cookies with a wet fingertip.

Bake for 15 mins until golden.

IMG_20181103_161425.jpg

Chewy autumn peanut butter cookies

These cookies are my new favourites! They are ridiculously easy to make and bake very quickly so it’s an instant gratification hit 😊 But it’s also veggie packed goodness, so that makes up for it being fairly calorific… Here is the recipe: let me know what you think!

Ingredients

250g nut butter. I tend to use the leftover stuff that’s gone a bit hard as the oil has been used up. Today I used a mix of almond and peanut butter.

65g pumpkin purée (see Spiced pumpkin cheesecake recipe)

80g xylitol or other sugar

100g flour – today I used buckwheat but rice, oats, quinoa… I’m sure all work)

1,5 tsp bicarbonate of soda

1 tsp gingerbread/speculaas spices

Pinch of salt

Chocolate chips

IMG_20180929_211426.jpg

Instructions

Preheat the oven to 170C and put baking parchment ready on a baking sheet.

Mix the nut butter with the pumpkin puree until well combined.

Add the other ingredients and mix well. If the mix is too wet, add up to 30g more flour bit by bit until the dough can be shaped.

Scoop bits from the cookie dough, roll it out to little balls with your hands, and flatten them with the palm of your hand on the baking sheet.

Bake the cookies for 8-10 mins in the middle of the oven. Let them cool off for half an hour so they become harder (or you can eat them with a spoon if you can’t wait😜). FYI these will remain quite soft and chewy on the inside. That’s just the type of cookie they are.

Enjoy!!

edf
Cookies!

Trio of almonds: milk, cake, and cookies

I’ve been making my own nut milk in the past few months, and have had great fun experimenting with what works and… what doesn’t. Making almond milk, though, leaves you with a kind of almond meal at the end, which I’ve been unhappy to throw away. I’ve been drying and freezing batches, but today I wanted to see how I could use it up immediately. And so here is my trio of almond recipes: milk, cake, and cookies.

Almond milk
A few notes: first of all, I’ve used my precious Vitamix to make this milk. You can use a regular blender too, though, without any problems. You’ll be left with more almond meal as the blender won’t grind the almonds as finely as a Vitamix, but that’s not a problem.
Secondly, you can obviously mix and match in your milks. I like almond and coconut the best. I’ve tried making rice milk and didn’t like it as much as the shop bought one, but others might disagree. You can substitute the almonds for other nuts, such as hazelnuts, pumpkin seeds, or even gluten-free oats.
Finally, try to buy raw almonds or other nuts. Non-raw ones are pasteurised and further processed.

Ingredients
150g almonds
30g coconut flakes
1.8l of water
50ml of rice syrup
A sprinkle of salt

Method
– Blend almonds, coconut flakes and water in the blender for 3 minutes.
– Pour the mix over into a high pot through a sieve to take the biggest bits out.
– Pour over into a second pot through a cheese cloth or thick kitchen towel so you’re left with a thin, milk like consistency. Thin it further with water if it’s too thin.
– Add rice syrup and a dash of salt to taste.
The milk will keep only for 3-4 days, so keep it in the fridge.

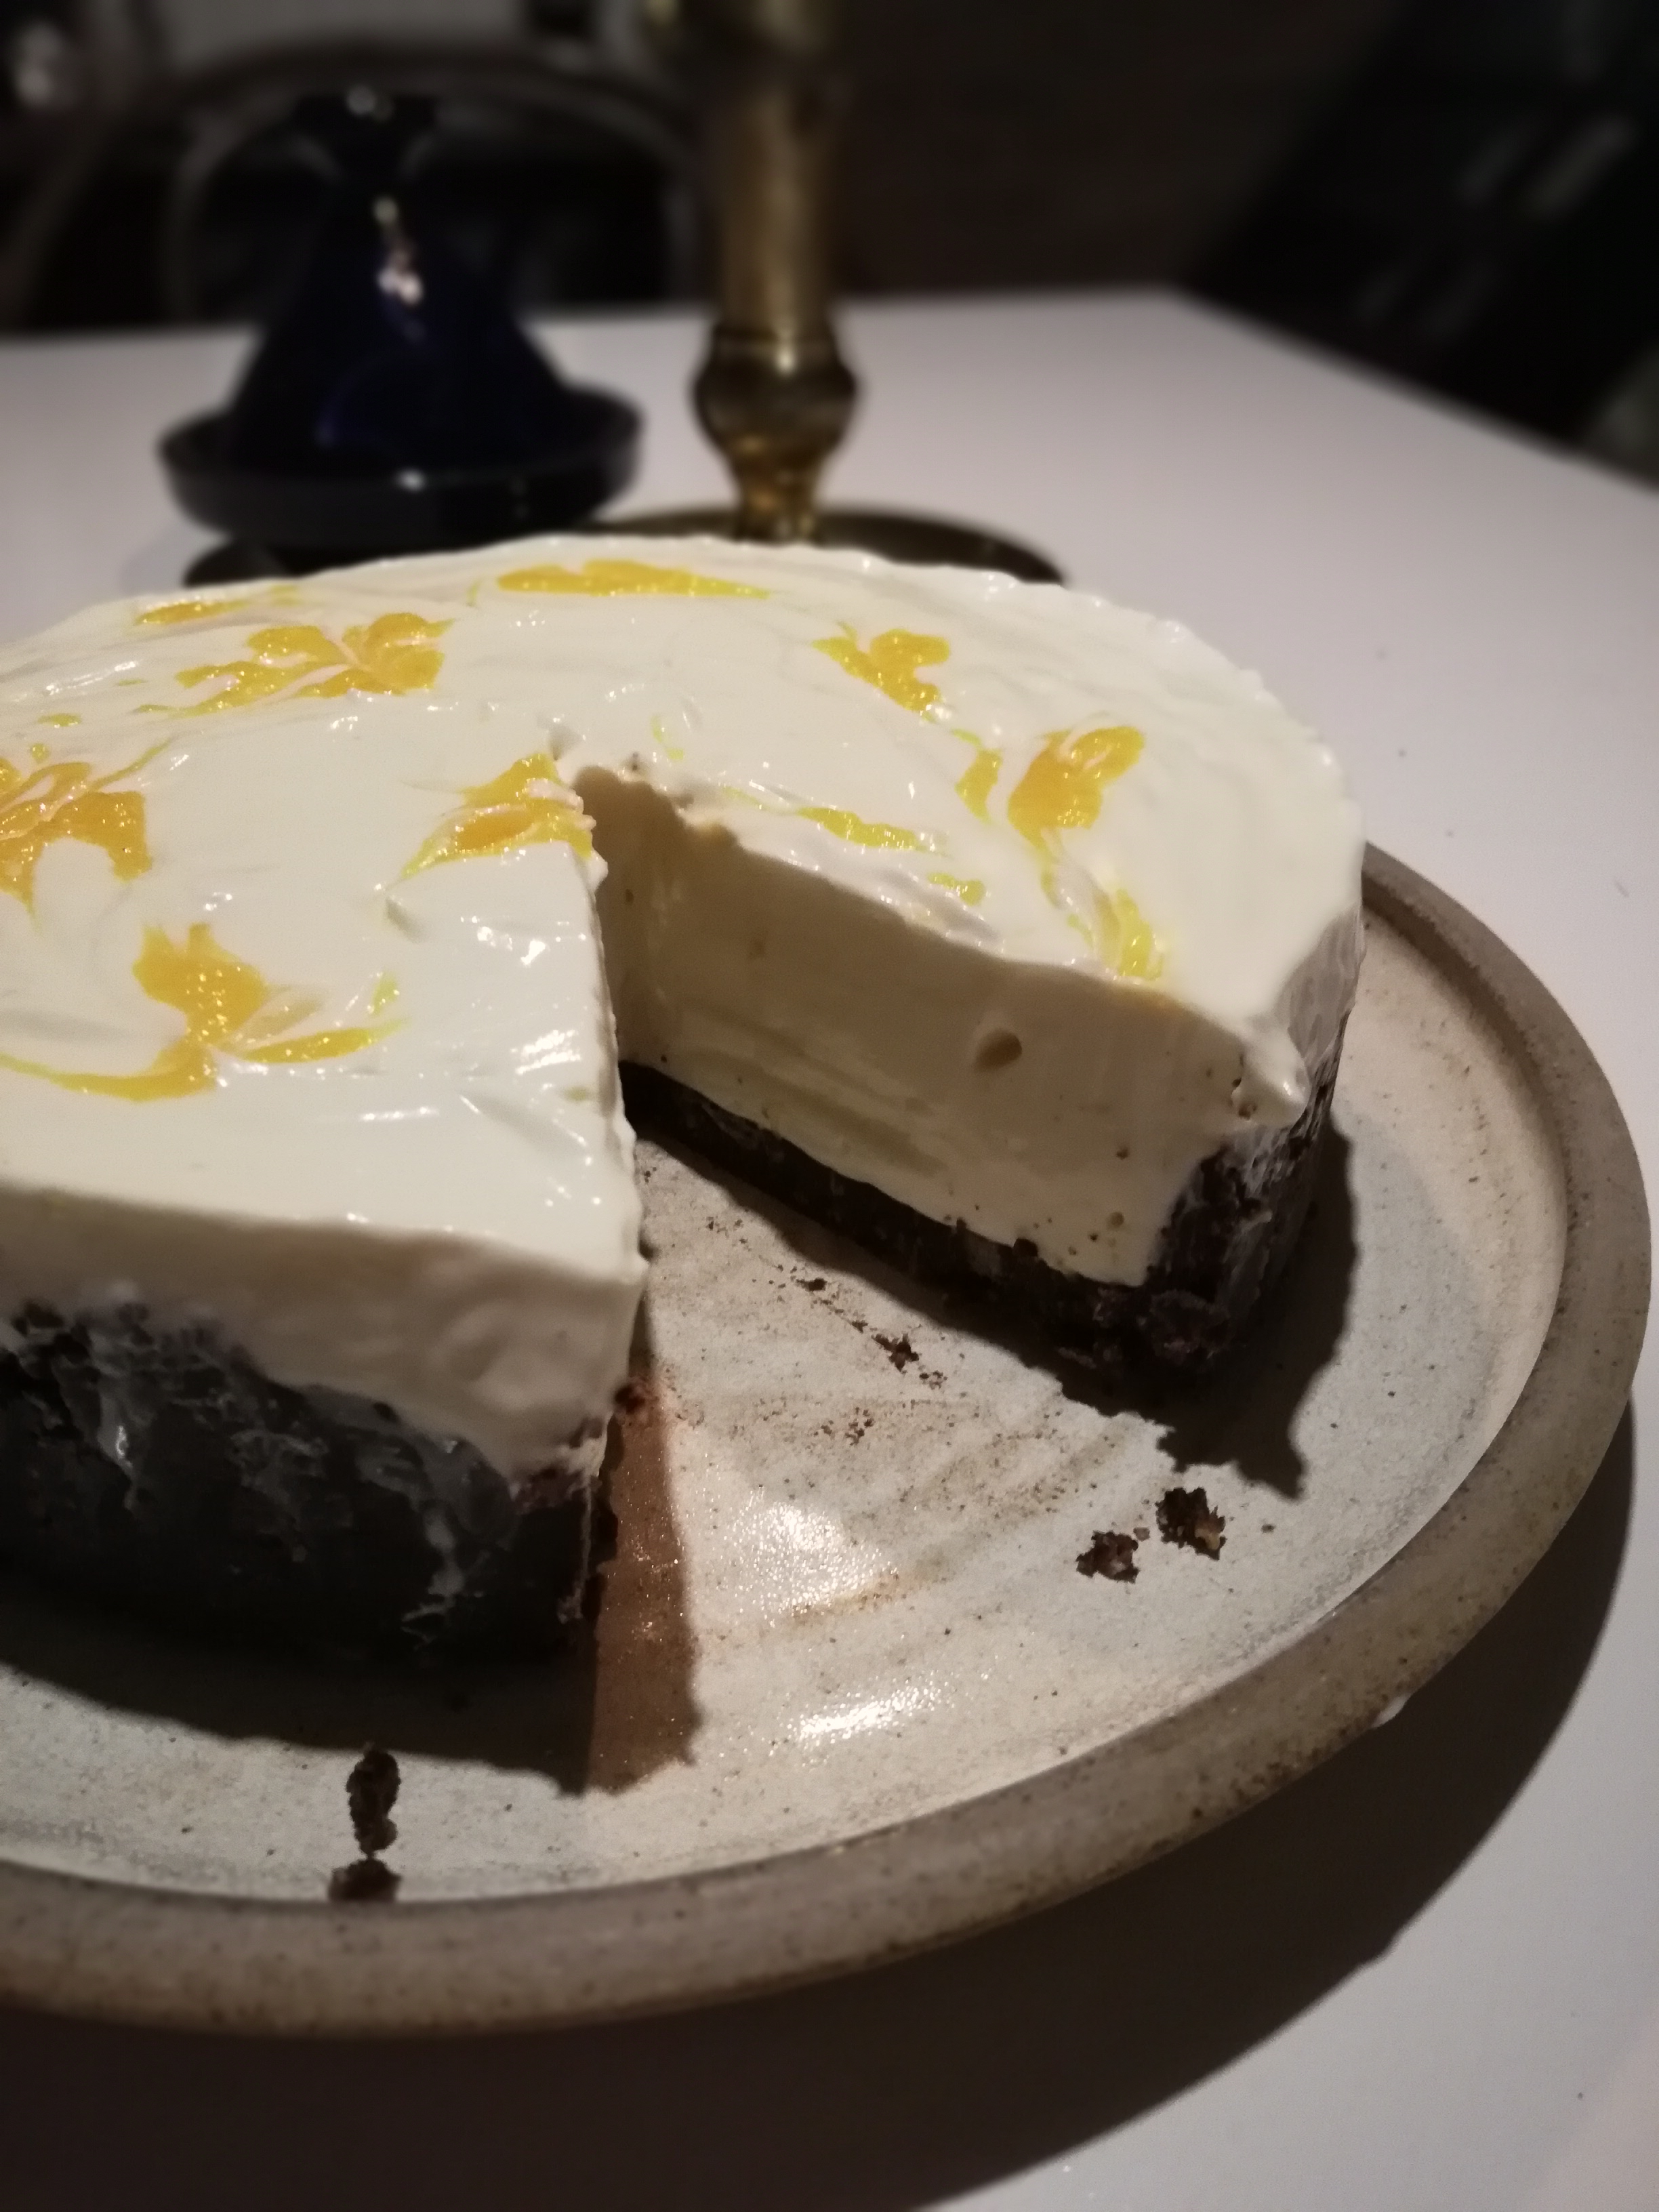
Almond and chocolate cake
This is an adaptation from Harry Eastwood’s delightful blonde recipe from her book Red Velvet and chocolate heartache. But with some significant changes…

Ingredients
100g sugar
3 eggs
250g grated butternut squash
100g almond meal (no need to make it completely dry)
50g buckwheat flour
2 tsp baking powder
A sprinkling of salt
100g dark chocolate, chopped into small pieces

Instructions
Pre-hear the oven to 180C.
Beat the eggs and sugar in a bowl for 5 mins until properly fluffy.
– Add the butternut squash and the dry ingredients apart from the chocolate and beat slowly.
– Pour half of the mix into a pre-oiled metal tin or a silicone tin, put the chocolate pieces on top, and pour he rest of te dough on top.
– Put into the oven for 25 minutes and leave to cool in the tin.
Enjoy with some cream!!
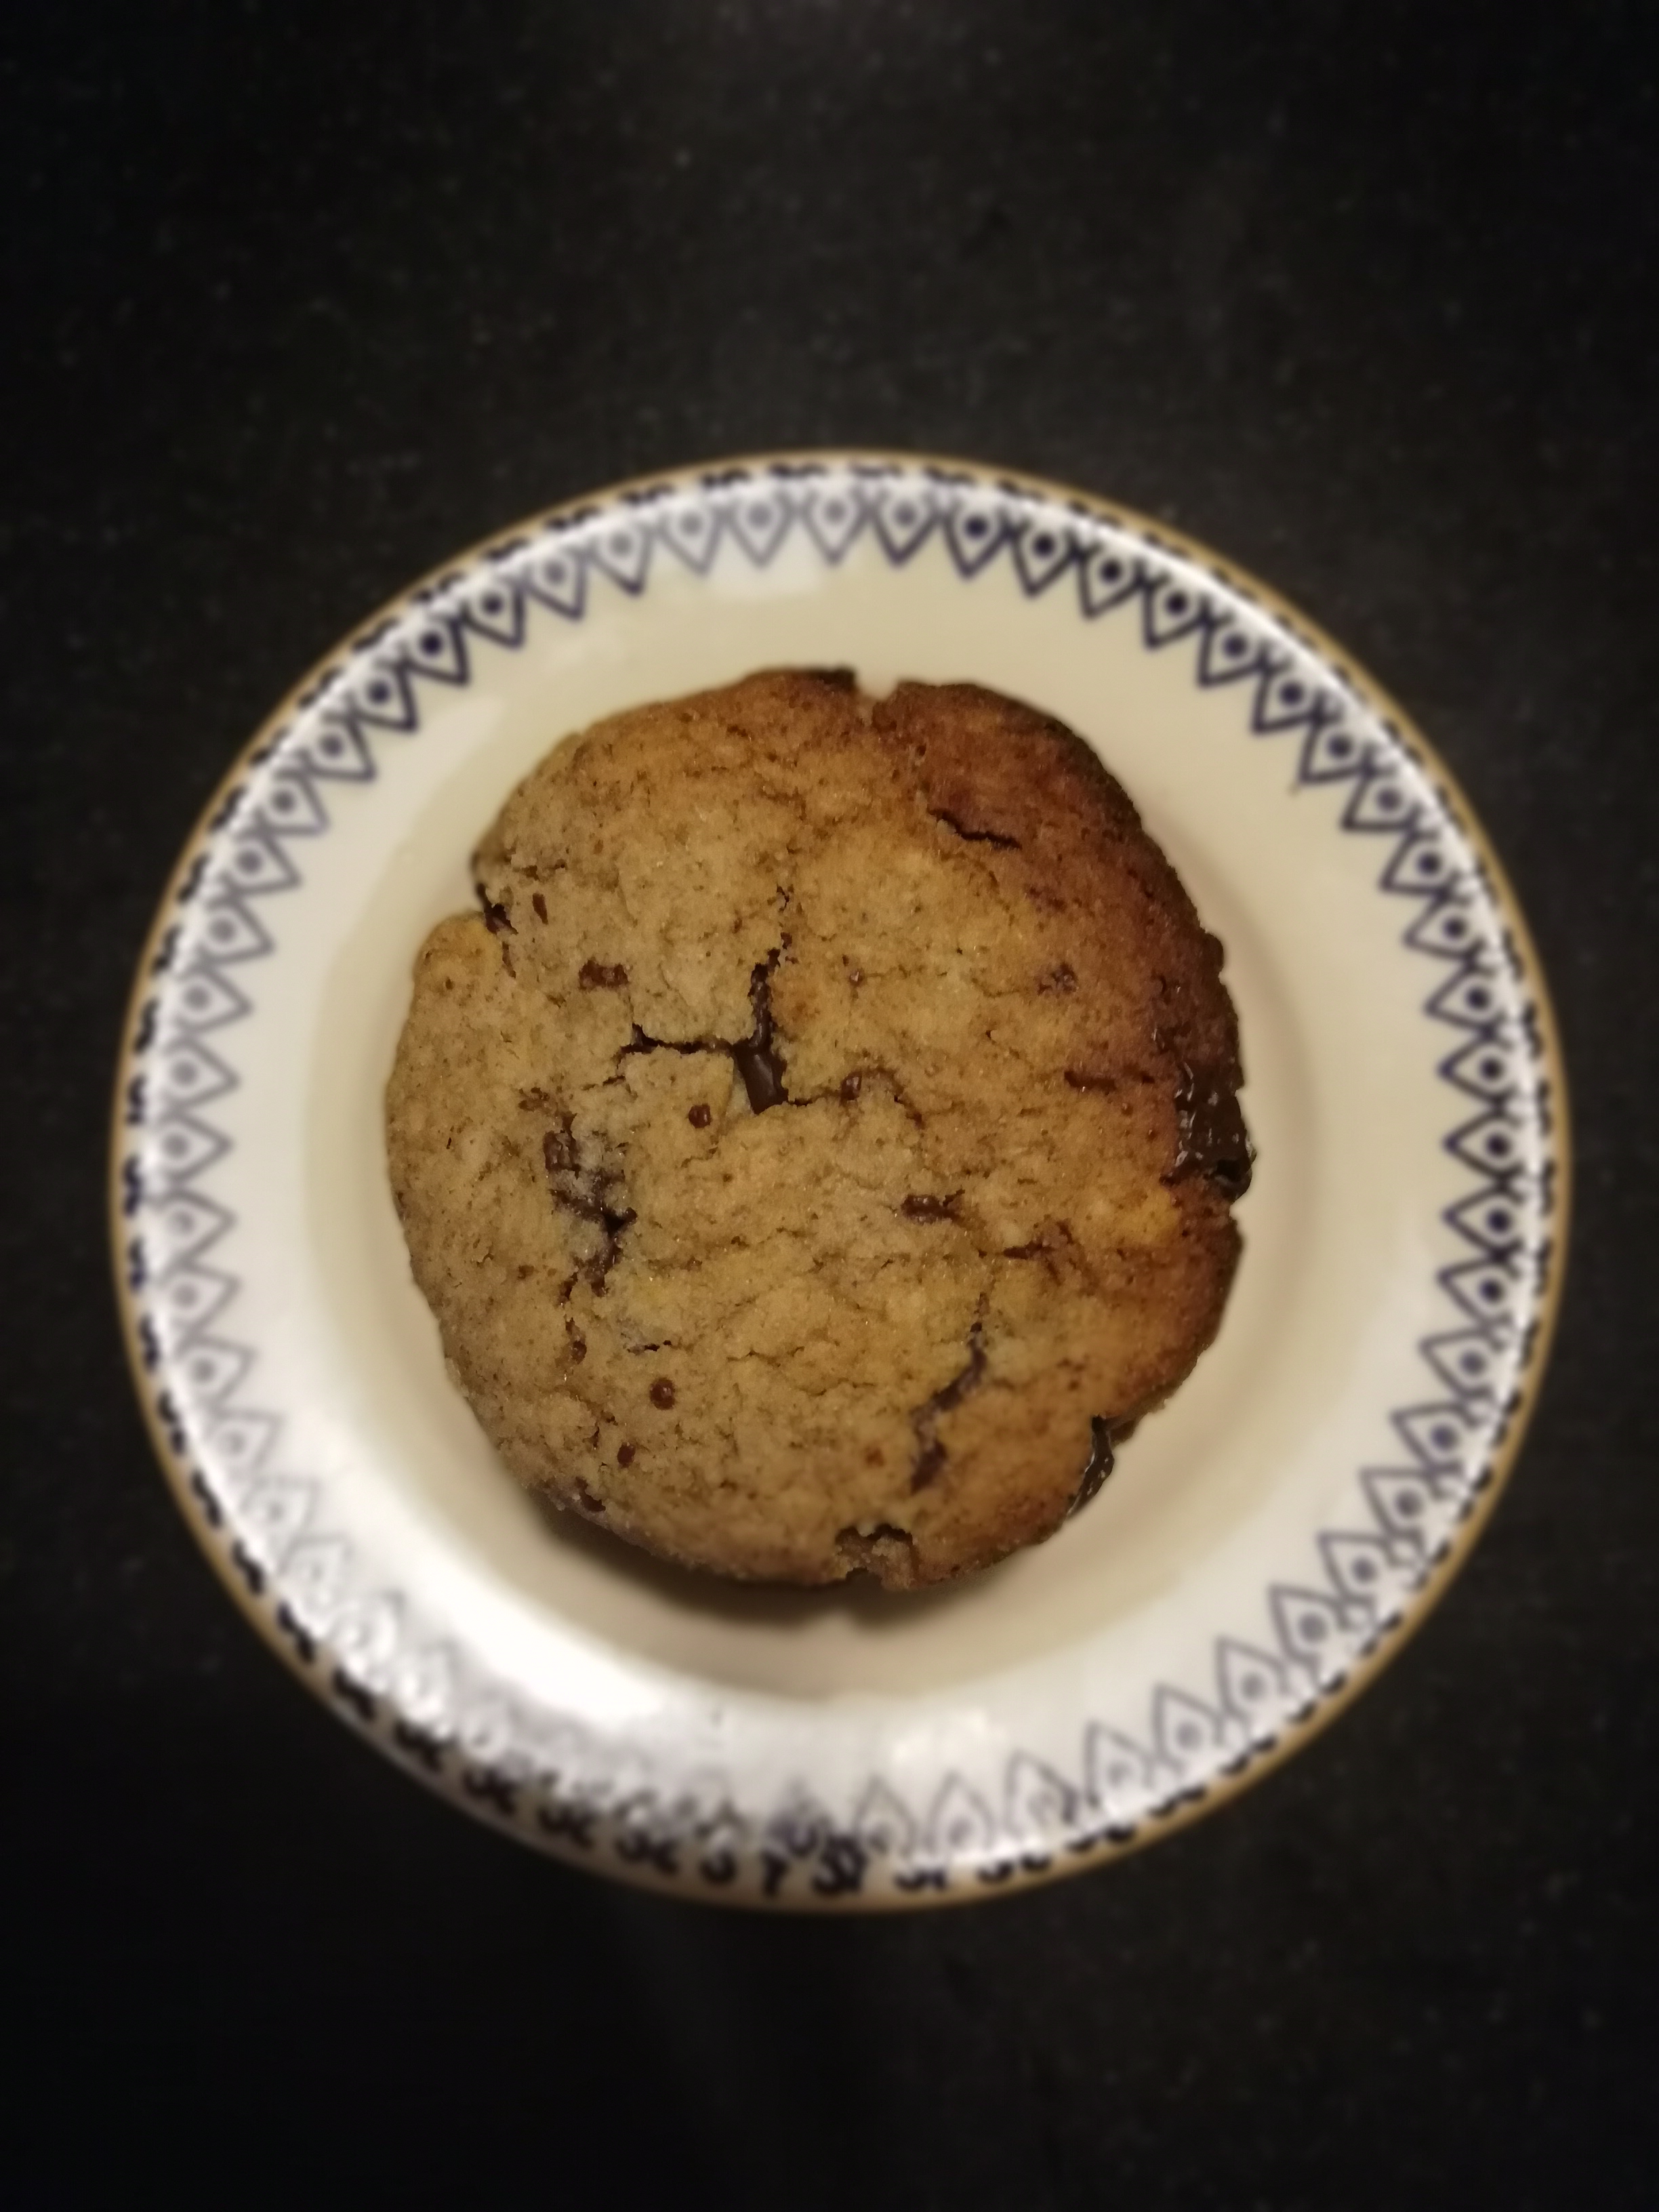
almonds 1.pngAlmond cookies
These are the staple of my kid’s youth. Nutritious and adaptable, I rarely go without them for a week.

Ingredients
100g sugar
200g cold lactose-free (or vegan) butter, chopped into pieces
2 eggs
200g almond meal (or however much you have left)
100g buckwheat flour
200g rice flour (or however much you need to top up the almond flour and buckwheat to 500g)
1 tsp xantham
100g chopped chocolate pieces
100g chopped pecan and/or hazelnuts

Instructions
Preheat the oven to 180C.

Beat the sugar and sugar in a bowl until fluffy.

Add the eggs and beat again until almost smooth.

Add the other ingredients and kneed together until you get a smooth dough.

Roll out the dough until it is 1cm thick and cut shapes out of it.

Put those onto baking parchment and bake for 17 mins (or slightly more or less – keep an eye on it that they don’t get too brown.)

almonds 2.png

Oreo covered energy balls

Part 2 of my prep for my son’s return to school…. Energy balls, with healthy fats, protein, carbs… Can’t go wrong and keeps my kid going from the end of school till dinner time. Again, to coax my child to try them, I added a oreo crumb. He loves them. These are easy to make, though I think it’s easier in a vitamix rather than a regular mixer. You’ll have a smoother finish. These are calorie bombs so enjoy in moderation.

Ingredients

40g pecans

40g almonds

150g dates

45g coconut flakes

30g raw cacao

5g protein powder

5g probiotics

5g flax seed

Two scoops peanut butter

Pinch of salt and vanilla

Crumbled oreos

Method

Put everything together in the vitamin and blend until smooth. Then make small balls of the mix and roll them in the oreo crumb. Enjoy!

IMG_20180901_124823.jpg

Chewy hazelnut and choc chip cookies with butternut squash

I recently bought Kate Hackworthy’s Veggie Desserts + Cakes, because though most of her recipes aren’t gluten or lactose free, there is so much inspiration to be got from her creativity. Today I made a first attempt at baking her hazelnut and butternut squash cookies. I adapted the recipe so it’s gluten and lactose free, and low in sugar, and the cookies turned out beautiful. My 6 year old nephew/godson helped me and it worked very well, so it’s a lovely recipe to try with kids. So here is my recipe, adapted from Kate’s – the cake is gluten free, vegan if you use vegan butter (otherwise lactose free), low in sugar (sugar-free if you use sugar-free chocolate), and high in protein:

Ingredients

125g butternut squash (you can replace it with sweet potato or parsnip)

115g unsalted lactosefree (or vegan) butter, melted and cooled

150g xylitol or erythritol (this makes it virtually sugar free)

1 tsp vanilla extract

125g rice flour

62g starch (tapioca, potato, or mais all work)

62g protein-rich flour (I used lupin, but I’m sure teff would work too)

1/2 tsp xanthan gum

1/2 tsp bicarbonate of soda

1/4 tsp salt (I used pink Himalayan salt)

50g finely chopped dark chocolate (I used chocolate with coconut sugar which doesn’t raise the blood sugar level as much as regular sugar – this is the only sugar present in the cookies)

50g finely chopped hazelnuts (I used those from my mum’s garden which I’d just roasted last night)

Method

Preheat the oven to 200C.

Cut the butternut squash into chunks and put in the oven for 30 minutes or until soft but not burned, then lower the oven temperature to 180C. Puree the butternut squash until smooth.

Beat the butter, sugar, and vanilla together (in a standing mixer or with a handheld one) until combined, then add the butternut squash puree and the other ingredients. Add the chopped chocolate and hazelnuts at the end and combine well. The dough will still be a bit sticky but should hold together well.

Make little balls out of the dough and press them into thick circle shapes on a baking sheet with parchment. Bake for 17 minutes covered with a baking sheet or aluminium sheet to stop them turning too brown.

Once you take them out of the oven, leave them to cool on the baking sheet for 15 minutes. It’ll be very tempting to eat them quickly, but resist the temptation 🙂 They’ll remain chewy in the middle with gooey chocolate chunks. Enjoy!!

cookies.jpg

Hazelnut & choc chip cookies with butternut squash - Nutrition Label


Blog at WordPress.com.

Up ↑